
Then I paid particular attention to the hierarchy of the visual representation of each frame, this time noticing the red cape as the most prominent feature of color throughout the scene. So I drew vector paths over the cape forms to create a set of base geometries that could start to inform my surface contours. I also drew over dark spots in each frame, provided mainly by the body figures that King Leonidas is approaching with each stride; however, I ended up abandoning those forms and looking at just the cape:

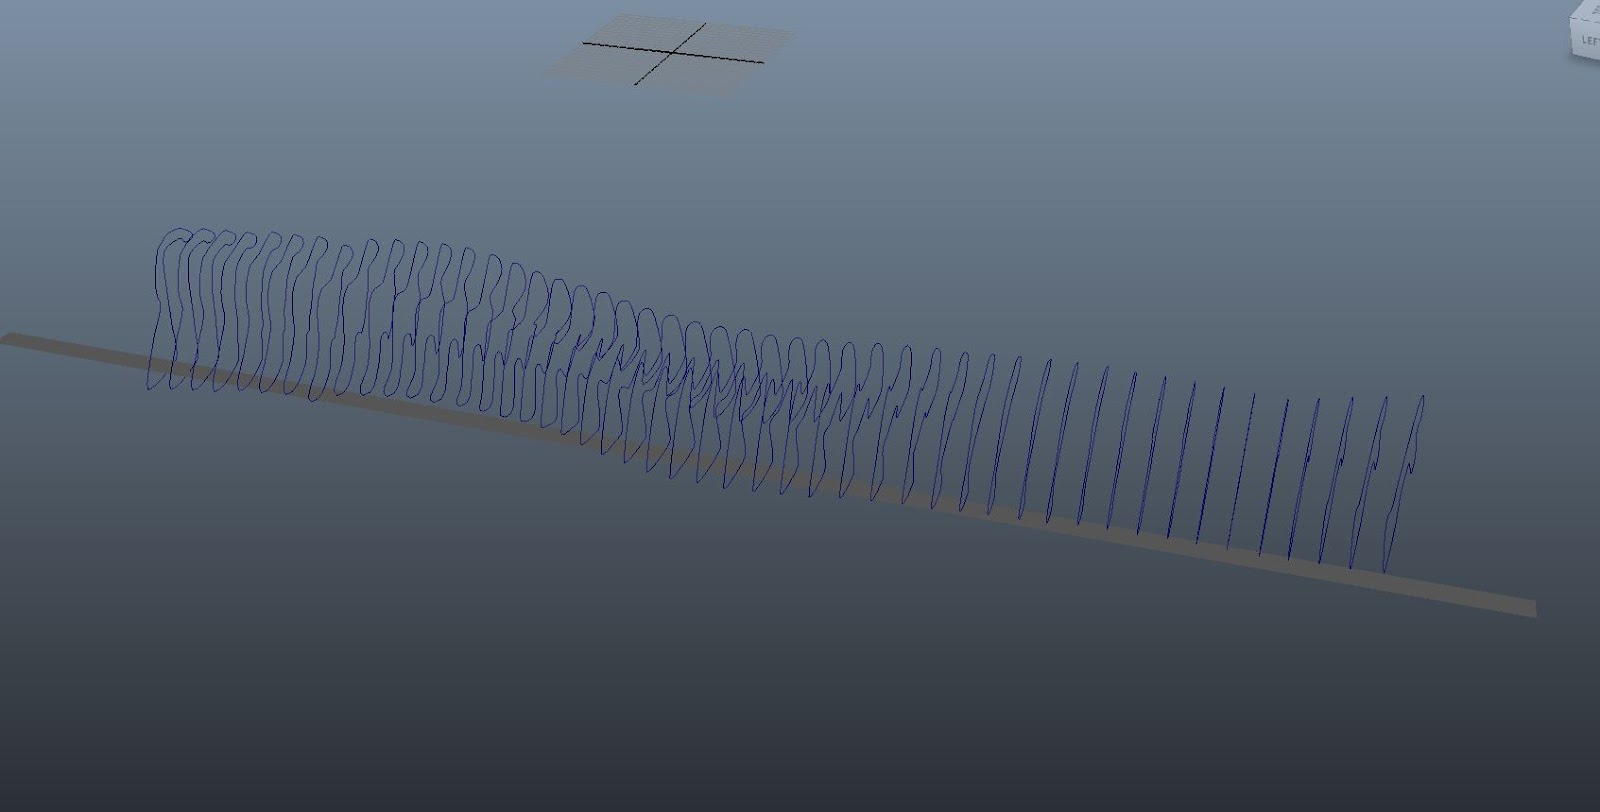
So, working still in Illustrator, I took the corresponding cape geometries from each scene and laid them out independently, spaced them evenly and blended them to create intermediate geometries for transition:
Finally, I went into Maya and started to take each of these pieces to fabricate my surface. The way I wanted to do this was to treat each piece as a cross section of a lofted surface, so that the contours of each piece start to form the combined piece. Here's a couple shots of the workspace:

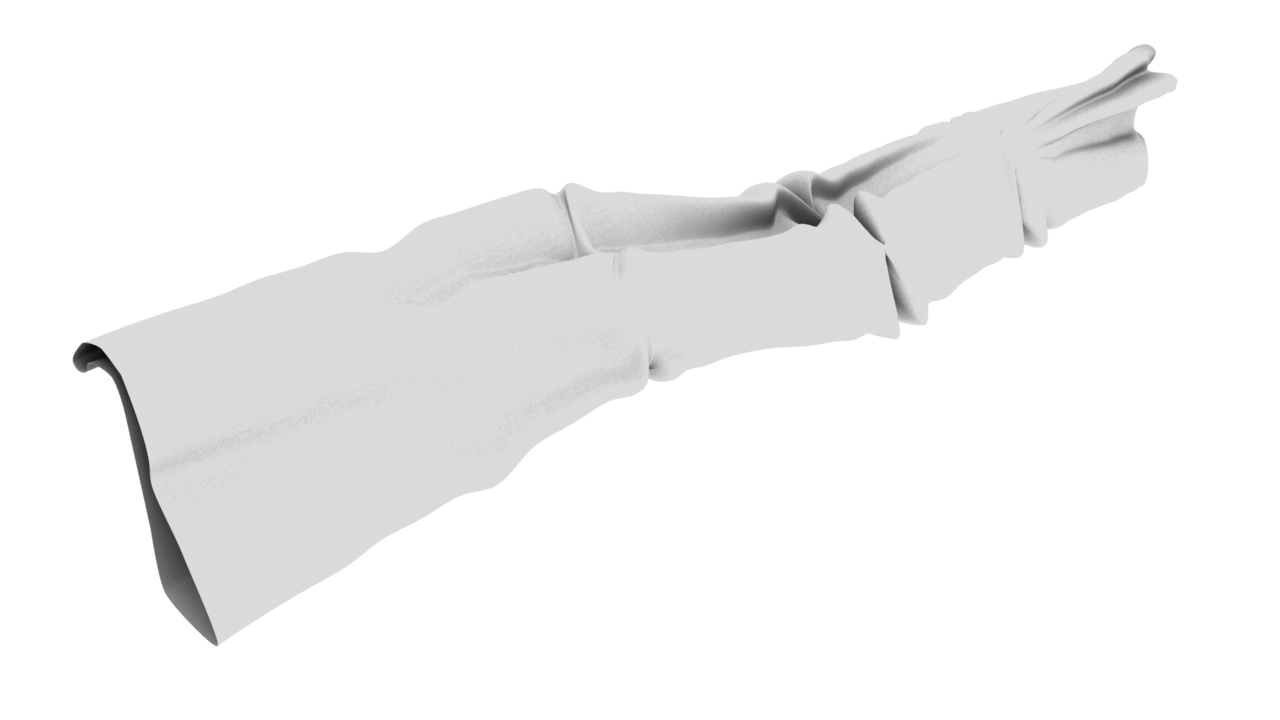
And, ultimately, some rendered views of the resultant form:


An interior view of the surface, "tunnel vision."
Very awesome. I like the rendering technique, it really lends to a clear understanding of depth and complexity in the model.
ReplyDelete